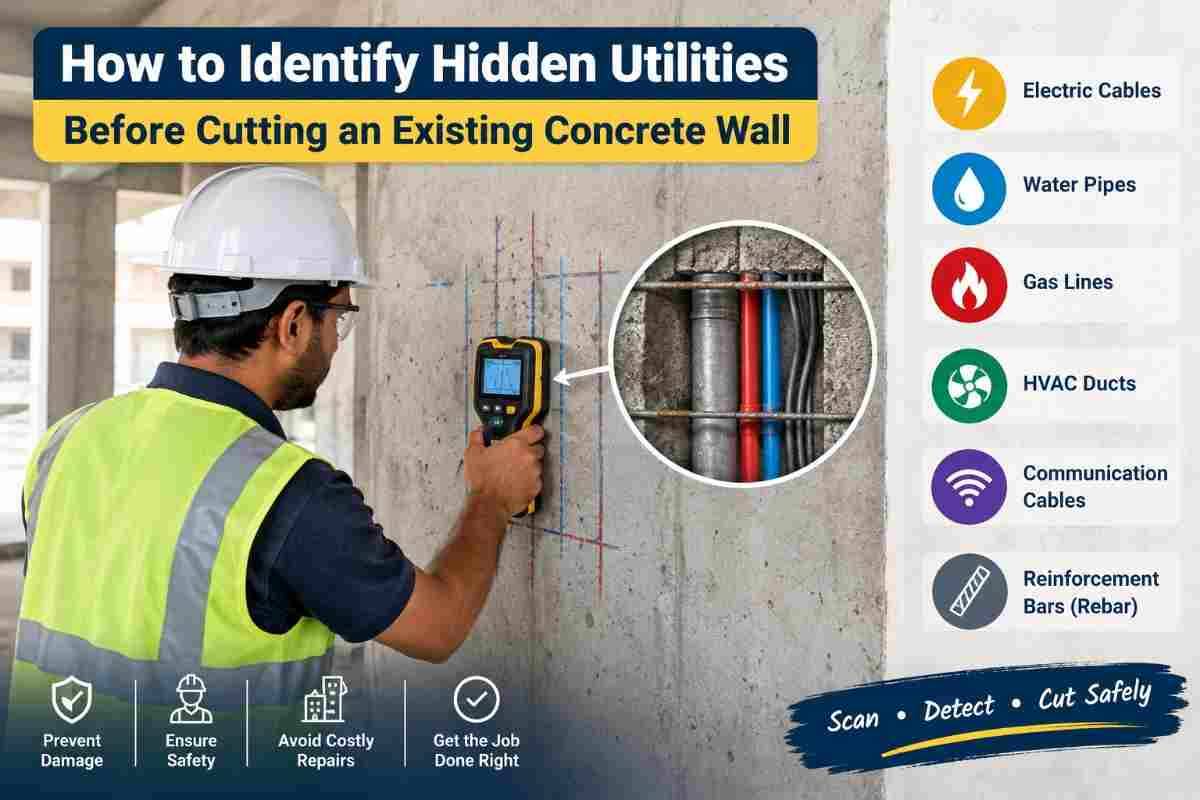
A concrete wall looks solid and silent from the outside. Inside, it can hold electrical conduits, water lines, gas pipes, data cables, reinforcement bars, and, in some buildings, post-tensioned tendons under extreme tension. Cut into one of these blindly, and you risk electrocution, flooding, structural damage, project delays, and injury to your crew.
Whether you are opening a doorway, adding a window, creating a duct opening, or installing a plumbing sleeve, identifying hidden utilities before cutting is the most important step. At Core Cutting India, we treat scanning and verification as non-negotiable parts of every wall-cutting job.
This guide walks you through the methods, tools, and safety practices used to detect what is hidden inside an existing concrete wall before a blade or drill bit touches it.
Why Hidden Utilities Are a Serious Risk in Concrete Wall Cutting
Renovation and retrofit work is growing across Indian cities, and many older buildings have been modified several times. Original drawings may be missing, and later alterations may never have been recorded. The result is a wall that no longer matches its paperwork.
Cutting into an unknown utility can cause:
- Electrical shock or fire. A diamond blade or core bit can slice through live conduits.
- Water damage. A ruptured pipe can flood floors below and damage finishes, equipment, and stock.
- Gas leaks. Cutting through a gas line is a life-threatening hazard.
- Structural compromise. Cutting main reinforcement bars or post-tensioned cables can weaken the element.
- Costly downtime. Emergency repairs, utility shutdowns, and legal disputes can far exceed the cost of a proper scan.
- Safety incidents. Workers and occupants can be injured.
Water used during wet cutting makes electrical contact more dangerous still. That is why detection comes before every cut.
Step 1: Review Drawings and Building Records
Start at your desk, not at the wall. Collect and study:
- Architectural drawings showing wall locations and openings.
- Structural drawings showing reinforcement layout, wall thickness, and beam and column positions.
- MEP drawings (mechanical, electrical, plumbing) showing conduit, pipe, and duct routes.
- As-built drawings, which reflect what was actually constructed rather than what was planned.
- Renovation and maintenance records documenting later changes.
Keep in mind that drawings are a starting point, not proof. Contractors often reroute conduits on site, and records of those changes are rarely updated. Treat every drawing as “probably right, but unverified.”
If you are working in an older building, talk to the facility manager, maintenance staff, or original contractor. Their memory of past modifications can save you from a surprise.
Step 2: Conduct a Visual Site Inspection
Before any equipment comes out, walk the area and look closely. Visual clues often reveal what lies behind the surface:
- Switchboards, sockets, and light switches on either side of the wall. Conduits usually run vertically from these points or horizontally along ceiling and floor lines.
- Distribution boards and meter rooms near the wall.
- Pipes entering or exiting adjacent walls, floors, or ceilings, especially in bathrooms, kitchens, and utility shafts.
- Surface patches, cracks, or uneven plaster that may indicate a past chase or repair.
- Wall-mounted fixtures such as geysers, taps, fire hydrant points, or AC units.
- Fire-fighting, sprinkler, and gas pipe routes along corridors and ceilings.
Check both sides of the wall. A utility that is invisible on one face may be obvious on the other. Take photos and mark observations on a sketch so the cutting team has a clear reference.
Step 3: Use a Rebar Scanner or Cover Meter
A rebar scanner, also called a cover meter or profometer, uses electromagnetic induction to locate steel reinforcement near the surface. It helps you:
- Find the position and spacing of reinforcement bars.
- Estimate concrete cover depth.
- Identify the direction of bars (vertical or horizontal).
- Choose cutting lines that minimise unnecessary rebar cutting.
Rebar scanners work well for detecting metallic elements, but they have limits. They generally cannot detect plastic conduits, PVC pipes, or voids, and they may struggle with very deep or densely reinforced sections. Dense mesh can also mask smaller metallic utilities.
Use a rebar scanner as one layer of detection, never the only one.
Step 4: Scan with Ground Penetrating Radar (GPR)
For a thorough picture of what is inside a concrete wall, Ground Penetrating Radar (GPR) is the industry’s preferred tool. A GPR unit sends high-frequency radar pulses into the concrete and records the reflections that bounce back when the waves meet a material change.
GPR can detect:
- Metallic and non-metallic conduits and pipes (PVC, HDPE, and others)
- Reinforcement bars and mesh
- Voids, honeycombing, and air pockets
- Post-tensioned tendons and ducts
- Changes in slab or wall thickness
How a GPR Scan Works
- Mark a grid on the wall surface, usually with chalk or tape, covering the planned cutting zone and a margin around it.
- Run the scanner along horizontal and vertical lines across the grid.
- Read the screen. Utilities appear as hyperbolic curves or distinct patterns. An experienced operator interprets depth, size, and type.
- Mark findings directly on the wall with colour-coded paint or markers.
Limitations of GPR
GPR performs best on dry concrete with moderate reinforcement. Heavy rebar congestion, high moisture content, or very thick walls can reduce clarity. Interpretation also depends on operator skill. Misreading a scan is a common source of error, which is why trained technicians matter as much as the equipment.
Step 5: Use Electromagnetic and Utility Locators
For live electrical cables and metallic lines, an electromagnetic (EM) utility locator adds another layer of safety. These devices detect:
- Live AC power lines by sensing the electromagnetic field around energised cables.
- Metallic pipes and cables by applying a signal and tracing the response.
EM locators are quick and effective for spotting energised wiring, but they will not find dead or de-energised lines, plastic pipes, or non-metallic services. Combine them with GPR for a more complete result.
A reliable detection workflow uses at least two independent methods so that the weaknesses of one tool are covered by the other.
Step 6: Mark, Map, and Document the Findings
Once scanning is complete, record everything clearly:
- Use standard colour codes on the wall: for example, one colour for electrical, another for water, another for rebar, and another for unknown anomalies.
- Note the depth of each detected object.
- Create a simple sketch or photo record of the marked wall.
- Flag unidentified objects as “unknown” and treat them as live or hazardous until proven otherwise.
- Share the map with the entire cutting crew and the site supervisor.
Clear marking prevents confusion on the day of cutting and creates a paper trail that protects everyone involved.
Step 7: Verify with Pilot Holes or Exploratory Methods
Even with scans complete, verification adds confidence. In uncertain zones:
- Drill a small pilot hole at a safe, planned location to confirm depth and material.
- Use inspection openings such as removing a small section of plaster or finish to expose a utility.
- Use a borescope or inspection camera to look inside a drilled hole without widening it.
- Hand-chip carefully only where safe and necessary, never near suspected live lines.
Exploratory work should follow the same safety rules as the main cut: isolate services first and use protective equipment.
Step 8: Isolate and Lock Out Utilities
Once you know what is in the wall, make the work zone safe:
- Switch off and lock out electrical circuits supplying the area. Use lockout-tagout procedures so nobody re-energises them by accident.
- Shut off water and gas supplies serving pipes in or near the cutting zone.
- Test for dead circuits with an appropriate tester before assuming a line is safe.
- Inform building occupants and facility teams about shutdown schedules.
- Keep fire extinguishers and first-aid kits within reach.
Never rely on assumption. A circuit labelled “off” on a panel may still be live if the labelling is wrong, which is common in older buildings.
Special Warning: Post-Tensioned Concrete
Some slabs and, occasionally, walls use post-tensioned (PT) tendons: high-strength steel cables stressed after the concrete cures. Cutting a PT tendon can release enormous energy, causing serious injury and structural failure.
If a structure is post-tensioned:
- Obtain structural engineer approval before any cutting.
- Use GPR to locate tendons precisely.
- Plan openings that avoid tendons entirely.
- Never cut or core without confirmed clearance.
When in doubt about the structural system, stop and consult a structural engineer.
Common Mistakes to Avoid
Experienced contractors still make these errors:
- Relying only on drawings. Real conditions often differ.
- Using a single detection method. One tool never tells the whole story.
- Scanning only one side of the wall. Utilities may be closer to the other face.
- Ignoring non-metallic services. PVC conduits and plastic pipes need GPR, not just a metal detector.
- Skipping isolation. Detection without shutdown still leaves risk.
- Using untrained operators. Misinterpreting scan data is as dangerous as not scanning.
- Rushing the process. A few hours of scanning can prevent weeks of repair.
- Poor marking and communication. A good scan is useless if the cutting crew cannot read it.
Choosing the Right Cutting Method After Detection
Once utilities are mapped, choose a cutting method suited to the situation:
- Wall saw cutting for large, straight openings such as doors, windows, and lift shafts.
- Wire saw cutting for thick or hard-to-reach structures.
- Core cutting (diamond drilling) for circular holes for pipes, ducts, and cables.
- Hand saw or ring saw cutting for flush cuts and confined spaces.
Diamond cutting is precise, low-vibration, and ideal for retrofit work where preserving the surrounding structure matters. Because of this precision, accurate pre-cut scanning lets operators work close to detected services with confidence.
Why Hire Professionals for Concrete Scanning and Cutting
Scanning and cutting look simple from the outside, but they demand training, calibrated equipment, and experience reading ambiguous results. Professional teams bring:
- Calibrated GPR and rebar scanning equipment
- Trained operators who interpret data correctly
- Standard safety procedures including lockout and PPE
- Insurance and accountability if something goes wrong
- Clean, controlled cutting with dust and slurry management
At Core Cutting India, our teams combine drawing review, site inspection, scanning, and verification before every cut, so your project moves forward without surprises. From core drilling and wall sawing to wire sawing and opening creation, we handle residential, commercial, and industrial concrete work with safety as the first priority.
Frequently Asked Questions
How do you find hidden pipes and wires in a concrete wall?
Use a layered approach: review drawings, inspect visually, scan with a rebar detector, run GPR, and use an EM locator for live cables. Verify uncertain areas with a pilot hole or inspection camera.
Can a metal detector find utilities inside concrete?
A basic metal detector can find some metallic objects near the surface, but it cannot reliably detect deep, plastic, or non-metallic services. GPR and EM locators are far more dependable.
What is the best tool for scanning concrete before cutting?
GPR is generally considered the most versatile tool because it detects both metallic and non-metallic objects, voids, and tendons. For best results, combine it with a rebar scanner and EM locator.
How deep can GPR scan in concrete?
Depth depends on the antenna frequency, moisture, and reinforcement density. Higher frequencies give better detail at shallow depths, while lower frequencies penetrate deeper with less resolution. A trained operator selects the right setup for the wall.
Is it safe to cut concrete without scanning?
No. Cutting without scanning risks hitting live wires, water or gas pipes, rebar, or PT tendons. Scanning is a basic safety and quality requirement.
Do I need to switch off power before cutting a concrete wall?
Yes. Isolate and lock out electrical circuits in and around the cutting zone, confirm they are dead with a tester, and shut off water or gas lines that may be affected.
What happens if you cut through rebar?
Cutting reinforcement can reduce a structure’s strength, particularly in load-bearing walls. Rebar should only be cut with structural engineer approval and a plan for any required strengthening.
How much does concrete scanning cost in India?
Costs vary with wall area, scan complexity, site access, and location. Contact a professional provider such as Core Cutting India for a quote tailored to your project.
Final Thoughts
Hidden utilities are one of the biggest risks in concrete wall cutting, but they are also one of the most preventable. A disciplined process of reviewing records, inspecting visually, scanning with multiple tools, marking clearly, verifying, and isolating services turns an uncertain job into a controlled one.
Every minute invested in detection protects lives, structures, budgets, and schedules. Never assume what is behind a concrete wall. Prove it.
If you are planning a wall opening, core drilling, or demolition-free cutting job, the specialists at Core Cutting India are ready to help you cut safely and precisely.