
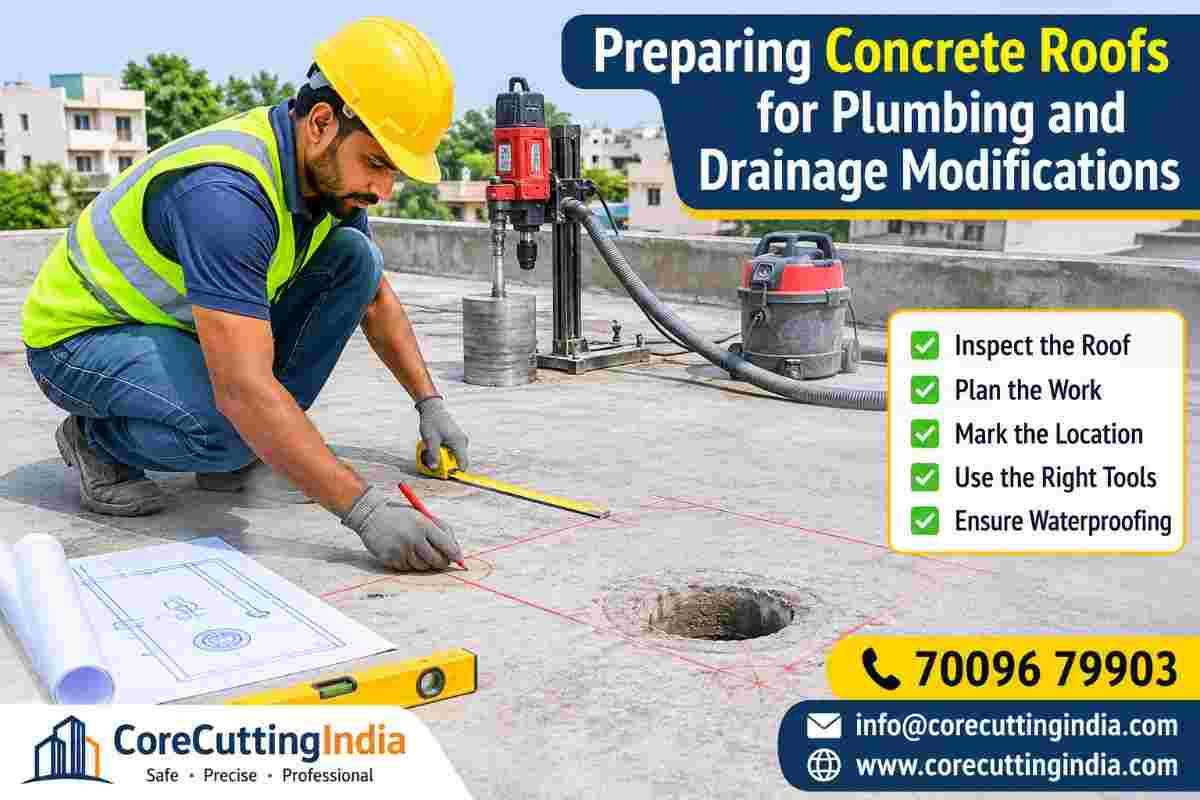
A concrete roof is built to last for decades. That durability is exactly why modifying one can feel intimidating. Whether you are adding a new rainwater outlet, relocating a soil pipe, installing a terrace drain or running a service line through the slab, every opening you make affects the structure, the waterproofing and the long-term performance of your building.
Done well, a plumbing or drainage modification is nearly invisible. Done badly, it leads to leaks, cracked slabs, corroded reinforcement and expensive repairs. This guide walks you through how to prepare a concrete roof properly, from the first inspection to the final waterproofing. It also explains why professional core cutting is the safest route. For expert help, the team at Core Cutting India is available on +91 70096 79903.
Why Concrete Roofs Need Careful Preparation
A concrete roof slab is more than a flat surface. It is a structural element made of concrete and steel reinforcement, usually topped with waterproofing, screed and sometimes tiles. It carries loads, resists weather and keeps water out of the building.
Cutting into it without a plan can cause several problems:
- Reinforcement damage: Cutting through steel bars can weaken the slab’s load-carrying capacity.
- Hidden service hazards: Electrical conduits, post-tension cables or old pipes may be embedded in the slab.
- Cracking and spalling: Hammer drills and breakers send vibration through the slab and cause micro-cracks.
- Water ingress: Poorly sealed openings become the most common leak points on a roof.
- Uneven drainage: A drain placed at the wrong level leaves standing water, which accelerates deterioration.
Preparation is what separates a clean, lasting modification from a recurring maintenance headache.
Step 1: Define the Purpose and Scope of the Modification
Start by being clear about what you want to achieve. Common roof-related plumbing and drainage modifications include:
- Adding a new rainwater outlet or terrace drain
- Installing or replacing downpipes
- Relocating a vent pipe or soil stack
- Passing water supply or drain lines through the slab
- Fitting a drain for a rooftop water tank area, garden or solar installation
- Creating openings for HVAC condensate drainage
For each one, note the required pipe diameter, the exact position, the slope needed for water to flow and the number of openings. This information determines the cutting method, the equipment and the waterproofing detail you will need later.
Step 2: Review Drawings and Check the Slab’s Structure
Before touching the roof, gather whatever documentation exists: architectural drawings, structural drawings, plumbing layouts and previous renovation records. These help you identify slab thickness, beam and column locations, reinforcement layout and any known embedded services.
If drawings are unavailable, which is common in older buildings, a physical investigation becomes essential. Ask a structural engineer to review the proposed openings, especially when:
- The opening is large (generally larger than a standard pipe core)
- Several openings are close together
- The opening is near a beam, column or slab edge
- The building is old, or the slab shows cracks or signs of distress
A structural opinion at this stage costs far less than repairing a compromised slab later.
Step 3: Scan the Concrete Before Cutting
This is the most important step in the entire process, and the one most often skipped.
Ground Penetrating Radar (GPR) scanning and similar non-destructive methods let professionals look inside the slab without damaging it. A proper scan can reveal:
- Rebar position, spacing and approximate depth
- Electrical conduits and cables
- Existing pipes or sleeves
- Voids, honeycombing or weak zones
- Slab thickness
With this information, the opening can be positioned to avoid critical reinforcement and hidden services. It also prevents the common accident of cutting into a live conduit, which is dangerous for the people on site as well as the building.
Even where a core must cross a bar, an experienced operator and engineer can make an informed decision about whether it is acceptable or whether the position should be shifted by a few centimetres.
Step 4: Plan Drainage Slope, Levels and Pipe Sizing
Good drainage depends on gravity, so levels matter as much as the hole itself. When planning a roof drain or outlet, consider:
Slope: The roof surface should fall toward the outlet. A common guideline for terraces is a gentle gradient, with the exact value depending on the design and local requirements. Verify against the project’s specification.
Outlet position: Place the drain at the lowest point of the catchment area. If the roof has existing dips or ponding spots, these are often the best locations, but only after confirming the slab can accommodate them.
Pipe diameter: Size the outlet for the roof area and expected rainfall intensity. India’s monsoon downpours can be extreme, so undersized outlets are a frequent cause of overflow. Your plumber or consultant should confirm sizing against local rainfall data and the applicable codes.
Overflow provision: Include a secondary overflow where practical, so a blocked primary drain does not flood the roof.
Mark these levels clearly on the roof surface so the cutting team and the plumber work from the same plan.
Step 5: Mark the Opening Accurately
Once the scan and planning are complete, mark the exact centre and outline of each opening on the roof. Use a measuring tape, a marker and, where precision matters, a laser level.
A few practical tips:
- Mark both the centre point and the diameter circle.
- Leave a margin from slab edges, beams and parapet walls.
- Double-check the position from underneath, so the opening does not land over a wall, a light fitting or a sensitive interior area.
- Confirm the marking with everyone involved before work begins.
A few minutes of checking here can save a day of rework.
Step 6: Choose the Right Cutting Method
Concrete is not forgiving, and the method you choose directly affects the quality of the result.
Diamond core drilling
For round holes, such as pipe penetrations and drain outlets, diamond core drilling is the preferred method. A hollow diamond-tipped bit, mounted on a rig and cooled with water, cuts a clean, precisely sized cylinder out of the slab. The benefits include:
- Smooth, accurate hole walls
- Minimal vibration and little risk of cracking
- Low dust and manageable noise
- The ability to cut through reinforced concrete cleanly
- Cores that can be removed intact
Slab sawing and wall sawing
For rectangular or larger openings, such as a roof hatch, a larger drain sump or a trench, slab sawing with a diamond blade delivers straight, controlled cuts.
Why not a breaker or hammer?
Chipping with a hand-held breaker is tempting because it looks cheaper. In practice, it:
- Creates uneven, oversized openings
- Transmits shock through the slab and risks cracking
- Exposes and sometimes bends reinforcement
- Produces heavy dust and noise
- Leaves a rough surface that is hard to seal properly
For roofs, where waterproofing integrity is critical, clean cutting is not optional. It is the foundation of a leak-free finish. Professional providers such as Core Cutting India use diamond equipment designed for exactly this kind of work.
Step 7: Prepare the Site for Safe Cutting
Roof work involves height, water and heavy equipment, so safety preparation is essential.
Protect the area below. Cover or clear furniture and equipment beneath the opening. Place a barrier or marker so no one walks under the cutting zone.
Manage water. Diamond cutting uses water for cooling. Plan how slurry will be controlled and collected so it does not stain walls, clog existing drains or run into interior spaces. A wet vacuum is typically used for this.
Secure the core. When a core is cut through the full slab thickness, it can drop. Professionals use methods to support or catch the core safely so that it never falls onto people or property below.
Check power and access. Make sure there is a safe power supply, stable footing for the rig and safe access for the crew and equipment.
Use proper protective equipment. Helmets, gloves, safety shoes, eye protection and ear protection should be standard.
Step 8: Install Sleeves and Pipework
After the opening is cut, the plumbing work can begin. For a drainage outlet, this usually involves:
- Cleaning the opening of slurry and debris
- Positioning the pipe, sleeve or drain body at the correct level
- Ensuring the pipe is plumb and aligned with the downstream drainage
- Securing it in place with suitable non-shrink grout or sealing material
Non-shrink grout is commonly used around the pipe so the gap fills completely without shrinking and cracking. A properly filled annular gap prevents water from tracking down the outside of the pipe.
Where required, use a puddle flange or a collar on the pipe. This acts as a barrier against water moving along the pipe surface through the slab.
Step 9: Waterproof the Penetration Properly
Penetrations are the most vulnerable points of any roof. Even the best cutting job can fail if the waterproofing around the pipe is neglected.
Good practice includes:
- Surface preparation: Clean, dry and free of loose material before applying any waterproofing.
- Fillet or chamfer: Form a small cove at the junction of the pipe and slab so the membrane can bend smoothly rather than crack at a sharp corner.
- Waterproofing system: Apply a compatible system, such as a liquid-applied membrane, a cementitious coating or a sheet membrane, according to the manufacturer’s instructions and the existing roof system.
- Reinforcing at details: Use a fabric or mesh reinforcement at the pipe junction where the product allows it.
- Overlap and continuity: The new waterproofing should lap properly into the existing membrane so there is no gap.
- Protective screed: Where specified, finish with a protective layer that does not obstruct the drain.
After curing, perform a flood or ponding test. Block the outlets, fill the area with a few centimetres of water and leave it for the recommended period (commonly 24 to 48 hours), then check below for dampness. Catching a defect now is far easier than discovering it during the monsoon.
Step 10: Finish the Surface and Test Drainage
Once the waterproofing has passed the test, restore the finished surface. Rebuild the screed and tiles to the designed slope, making sure nothing blocks the drain inlet. Fit a suitable grating or dome strainer to keep leaves and debris out.
Finally, test the system with a bucket or hose to confirm the water flows freely toward the outlet, does not pool and drains away without backing up.
Common Mistakes to Avoid
Even experienced property owners and contractors make avoidable errors. Watch out for these:
- Skipping the scan and cutting blindly into reinforcement or conduits
- Using breakers instead of diamond cutting, causing cracks and rough openings
- Poor levels, leaving the drain higher than surrounding surfaces
- Ignoring waterproofing details at the pipe junction
- Undersized outlets that cannot handle heavy rain
- No testing before sealing up the finished roof
- Hiring unqualified operators to save money, then paying more for repairs
Why Hire a Professional Core Cutting Service
You can find general contractors who offer to “make a hole” in a slab, but concrete cutting is a specialised skill. A professional service brings:
- Precision: Accurate hole size, position and finish
- Safety: Trained operators who manage water, dust, heavy equipment and falling cores
- The right equipment: Diamond core rigs, saws and, where needed, scanning technology
- Minimal disruption: Cleaner, quieter work with less mess
- Structural awareness: Experience in positioning cuts to protect reinforcement
- Lasting results: A clean opening that makes waterproofing simpler and more reliable
Core Cutting India provides concrete cutting solutions for residential, commercial and industrial projects. If you are planning plumbing or drainage modifications on a concrete roof, you can reach the team at Core Cutting India or call +91 70096 79903 to discuss your requirements.
Frequently Asked Questions (People Also Ask)
Can you drill through a concrete roof for plumbing?
Yes. With the right preparation, including scanning, marking and a suitable cutting method, a concrete roof can be drilled for pipes. Diamond core drilling is the cleanest and safest approach.
How do you cut a hole in a concrete roof slab for a drain?
Scan the slab, mark the opening, then use a diamond core drill to cut a clean circular hole. Afterwards, install the drain or pipe, grout the gap and waterproof the penetration.
Does core drilling weaken a concrete slab?
A small, well-planned core hole generally has a limited effect, especially when it avoids the main reinforcement. Large, closely spaced or badly placed openings can matter, so a structural engineer should review them.
How do you waterproof around a pipe through a concrete roof?
Use non-shrink grout around the pipe, form a small fillet at the base, apply a compatible waterproofing membrane with reinforcement at the junction, and complete a flood test.
Is GPR scanning necessary before core cutting?
It is strongly recommended. Scanning shows where rebar, conduits and other items are hidden, which reduces the risk of damage and accidents.
How long does it take to core drill a concrete roof?
A single standard pipe opening can often be cut in a short time, but the total duration depends on slab thickness, hole size, reinforcement and site access. Preparation and waterproofing take longer than the cutting itself.
Can I install a new roof drain on an existing flat roof?
Usually yes, provided the slab can accommodate it and the roof can be sloped toward the new outlet. Consult an engineer and an experienced cutting contractor first.
Final Thoughts
A concrete roof can accommodate plumbing and drainage upgrades, but only when the work is planned with care. Scan before you cut, mark accurately, choose clean diamond cutting, install the pipework correctly, waterproof thoroughly, and always test before finishing. Each step protects the structure and the comfort of everyone beneath it.
If you want the job done safely and neatly, speak to specialists. Visit Core Cutting India or call +91 70096 79903 to get expert guidance and reliable concrete cutting for your roof modification project.